Create requests from the menu bar
The most common way to create a request is by using the menu bar. After you create a request, it is automatically assigned a unique number and then tracked from start to finish. This ensures task completion and accountability for all steps within the request's workflow.
Caution: If your PPM instance supports multiple languages, note that when you create a new request type, its definition language is automatically set to your current session language. For more information, see the Multilingual User Interface Guide.
To create a request from the menu bar:
-
Log on to PPM.
-
Do one of the following:
-
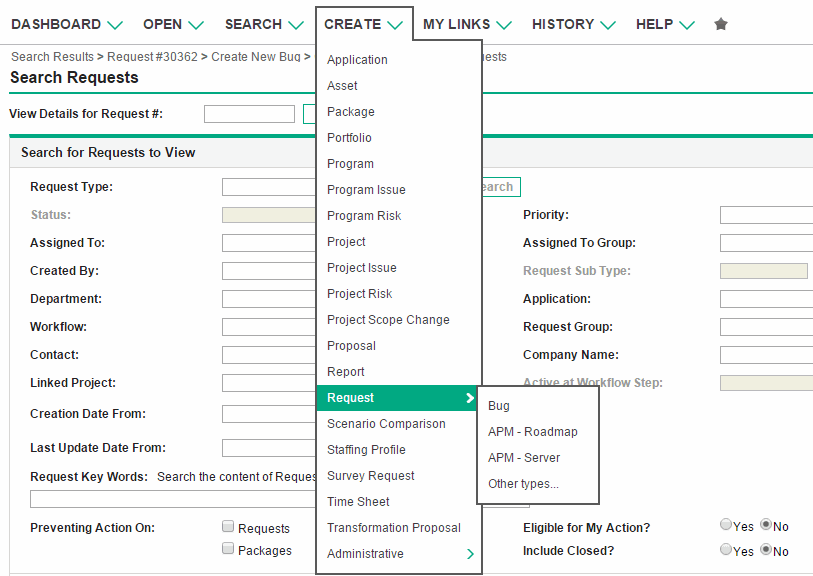
If it is your first time to create a request, on the Create menu, click Request.
The Create New Request page opens.

-
To create a request with a recently used request type, on the Create menu, click Request > <Request Type>, and skip to step 5.

The Create Request submenu lists the five most recently used request types, same as the request types listed in the Create Based on Desired Action section of the Create New Request page. If you delete all requests of a request type (including closed requests), that request type is removed from the Create Request submenu. The Create Request submenu disappears when all recently used request types are removed.
-
To use a request type other than the most recently used ones, on the Create menu, click Request > Other types.
The Create New Request page opens.
-
-
From the Request Type list, select the type of request you want to create.
The request type you can select depends on your licenses and access grants, and on the security groups to which you are assigned. To save you time, the Create Based on Desired Action section lists the most recently used request types.
-
Click Create.
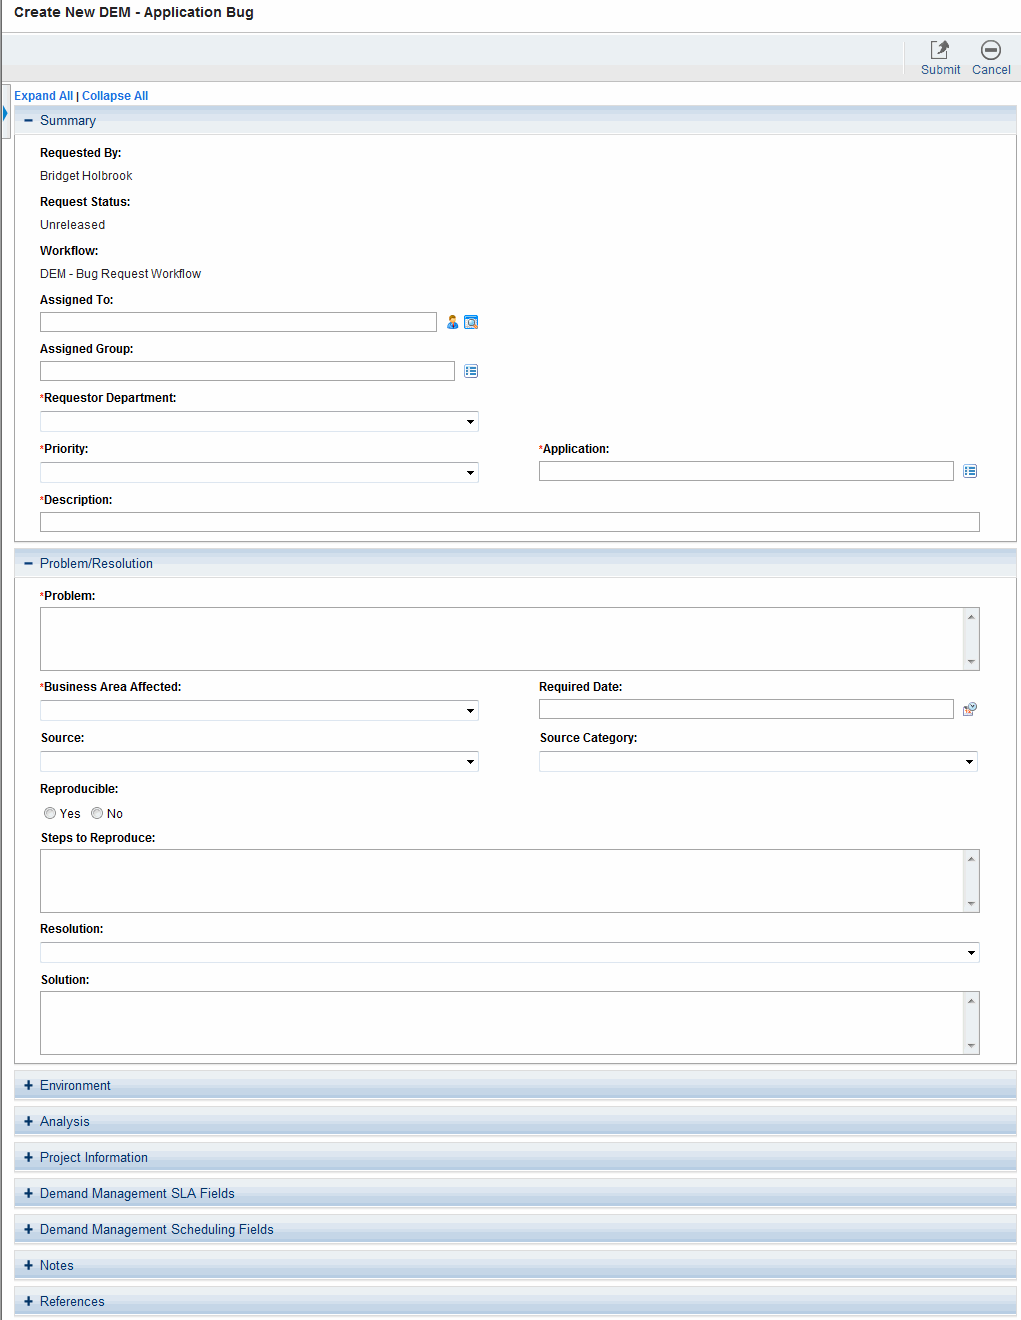
The Create New <Request Type> page opens.

The sections displayed on the request detail page vary depending on the request type you selected.
-
In the header section, complete the required fields, and provide any useful optional information about the request.
Make sure not to include any HTML related characters in a request's description. If a request contains HTML related characters in its description, the request is not displayed in the My Requests portlet.
-
In the details section, complete the required fields, and provide any useful optional information about the request.
The details section can have none, one, or many subsections. For information about a specific field, click the Help icon (if available) next to the field.
-
In the Notes section, enter additional information about the request that you want to make available to other users.
-
Use the References section to add references to the request.
For details on how to add references, see Add references to requests.
-
Click Submit.
The Request Creation Confirmed page opens and displays the number assigned to the new request, and the request description.
-
If you do not want to submit the request yet but want to save the request, click Save Draft. This button is available only if your administrator has enabled it by setting the parameter
ALLOW_SAVE_REQUEST_DRAFTtotrue. For details, see Server parameters.Note: If your administrator configures PPM to skip the confirmation page, you can skip the Request Creation Confirmed page and directly go to the request details page. For details, see the SKIP_REQUEST_CREATE_CONFIRMATION_PAGE parameter in Server parameters .
However, the Finish Execution before displaying the request page to the user option does not work for request creation. Therefore, when you select this option and skip the request creation confirmation, the request page opens before the execution finishes and the request status may be incorrect.
-
To see the generated detail page for a submitted request, click Request #.
After you submit a new request, Demand Management assigns it an initial status, such as New, and then routes it along a standard business process of approvals, decisions, and actions, depending on the associated workflow. For more information, see Process and manage requests.


